
Five ways to preserve your apple harvest
Humans have been consuming apples since prehistoric times. The apples that were present during this time scarcely resembled the ones we consume today. I can imagine however that these would be a welcome treat to any prehistoric individual considering the widely varied diet of the time. From what I have seen through reading, the ways to preserve the apple harvest were much more limited. The typical ways over time to preserve most of the wild-harvested crabapples would have been to cut them in half and then dry them in the sun. This way they could collect the bounty of summer and consume it when the cold winds of winter blew.
Over time, as travelers expanded from country to country, the seeds started to take root in new environments. The trees began adapting to their environments which allowed a continuation of the development of apples. There are even references to them by Homer in The Odyssey which was written sometime between 900 and 800 BC. By the time writers such as Virgil, Cato and Pliny were alive, over two dozen varieties of apples existed. Thanks to the knowledge developed in monasteries, apples began to resemble what we are used to eating today.
Apples come to North America
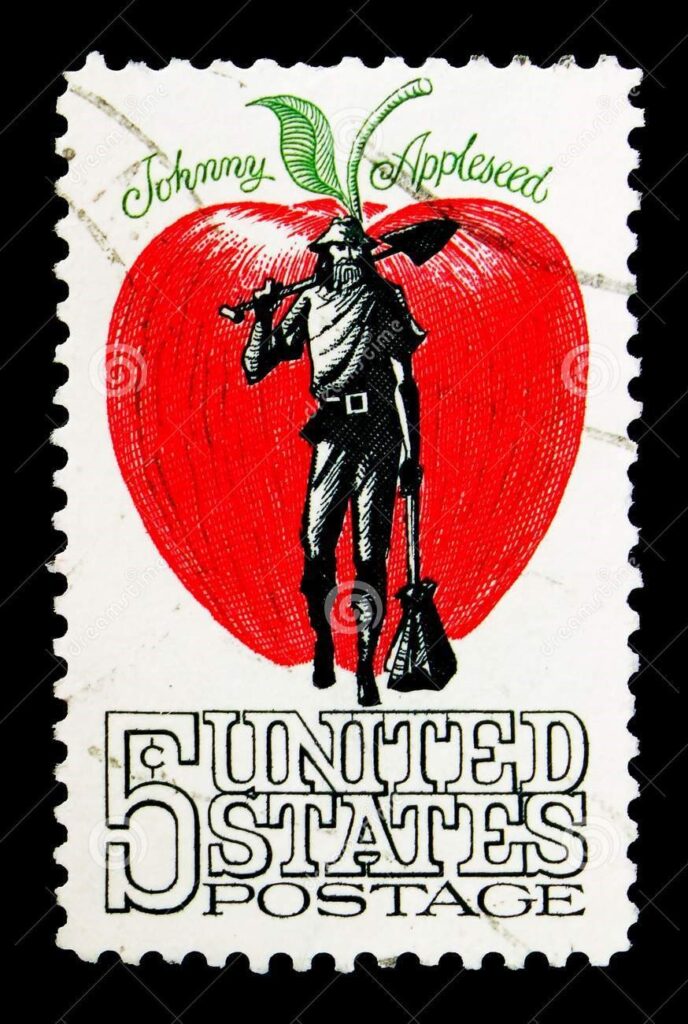
It is believed that apples were not native to North America but instead were brought over by settlers in the early 17th century. The colonists found that many fruit-bearing trees did well in the new colonies. Where some trees did exceedingly well, others however obviously needed to adapt to the harsher conditions found in North America. This, of course, caused even more adaptation by the trees. Thanks to many of the settlers in North America, along with people such as John Chapman (aka Johnny Appleseed) and Thomas Jefferson, apples became commonplace from sea to shining sea. During this time, it was customary to preserve the apple harvest for enjoyment later either via drying, keeping them in a root cellar, or making hard cider.
Today the apples we purchase at our local farmers market or grocery store tend to be grown now for their hardiness for transportation, the color of their skin, or perhaps just because they’re tasty. In the 19th century, there were over 14,000 varieties cataloged in North America. Sadly, many of the original apples that would have existed one hundred to two hundred years ago have fallen out of favor by most consumers. Currently, in North America, there are about 90 varieties grown. Ultimately, it is up to us consumers to “vote with our wallet” and support our local farmers or orchards that may be growing the more unusual varieties. This will ensure those varieties do not become extinct.
Interior Alaska Apples
It’s Autumn now in the lower 48. Here in Alaska, we zoom through our seasons much faster so our apple picking season ended about a month prior. Thankfully we have Clairs Cultivations, a local orchard, that allows u-pick and from what I have heard recently we might have one or two more soon that will be competing with them.
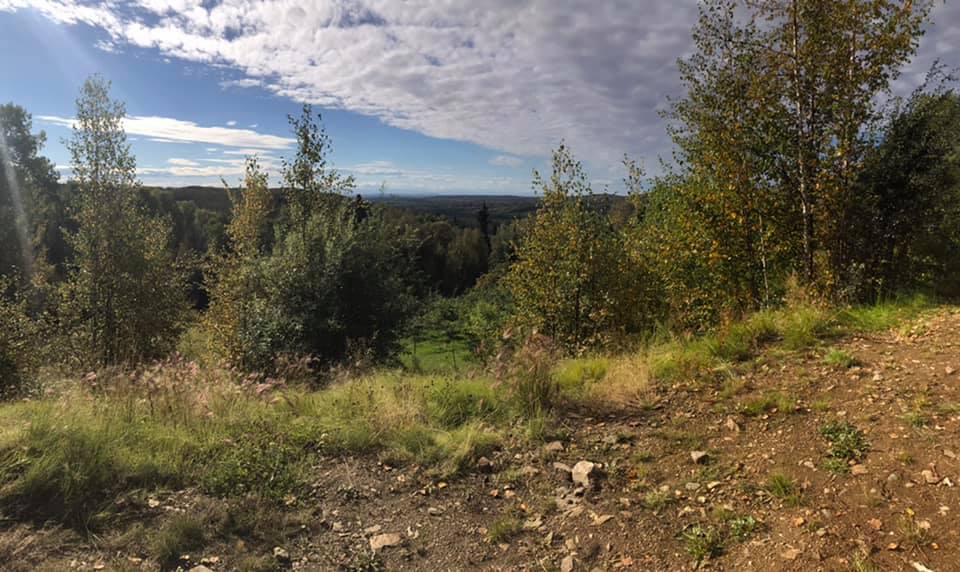

Clairs Cultivations is situated high up in the hills that surround Fairbanks. This allows them to grow in a separate micro-climate than our own in North Pole so they have the ability to grow varieties that we cannot grow at our own property. Even still, they graft many of their quick-growing varieties to hardy rootstock. The crabapple rootstock then can lend its strength to the apple tree that higher up produces the apple.
The apples that grow up here in Interior Alaska are much smaller than their Lower 48 counterparts and tend to be tart which makes them useful for preservation rather than just everyday eating. Almost every year now we have done the 30-minute scenic drive on Nordale road out to Chena Hot Springs road to usually enjoy a couple of hours outside in the warm autumn sunlight. We’ll bring bottled water, our bags for collecting apples, and a pair of good hiking boots because of the nature of the orchard.

Preserve your apple harvest
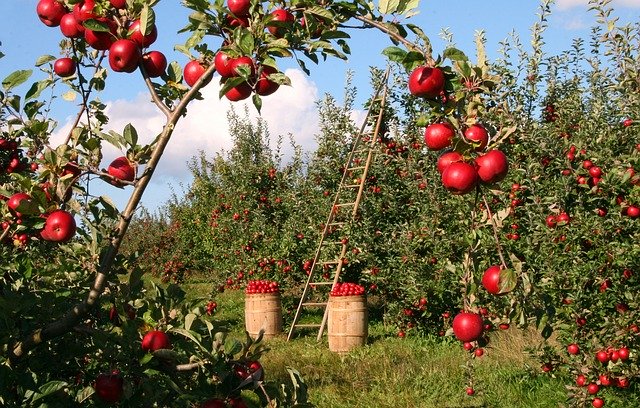
I first learned how to preserve our apple harvest in Maryland where there were large amounts of orchards. These orchards produced huge, tasty apples that ultimately helped me create recipes around them. I find typically when you have a huge amount of fresh food to work with it can be rather inspiring. Suddenly there is no limit to the ways to use up all those apples!
Preserve your apple harvest: Crockpot Apple sauce
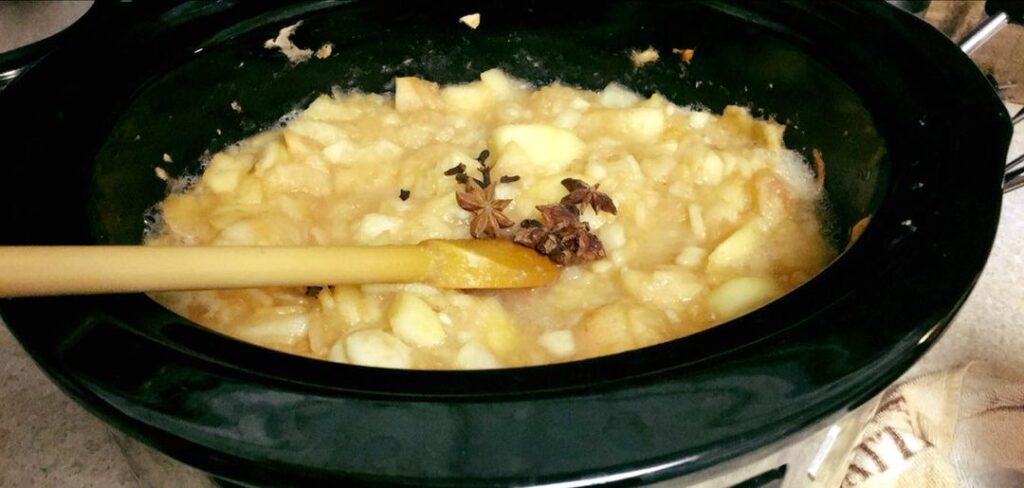
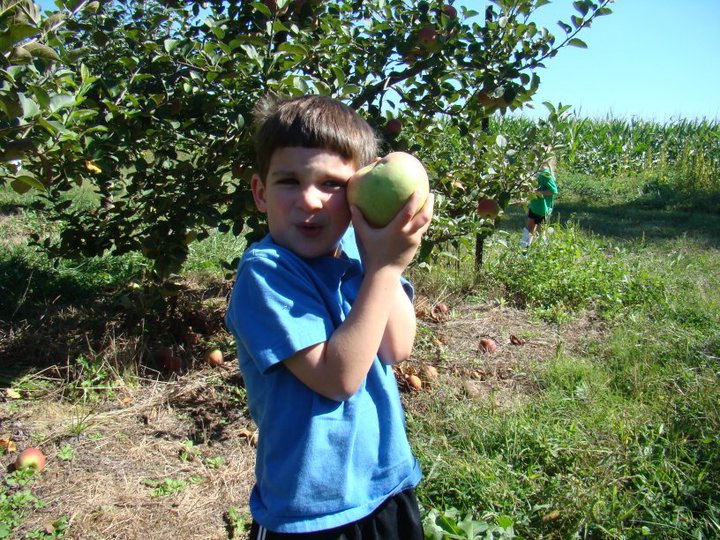
This is the easiest, by far, to make. In Maryland, I would pull out my Pampered Chef apple peeler and corer and peel and core all the apples. I would then throw the peeled apples into a large bowl with lemon juice and water to help prevent browning. Next, we would throw the entire lot of, now chopped up apples into the crockpot. Turn the crockpot on medium heat and enjoy the resulting aromas that would permeate the house. I used to allow my then 4-5-year-old son to pick out whatever flavors he wanted in his apple sauce. His typical favorites were cinnamon and nutmeg but sometimes we would use spices like cloves, star anise, allspice, and ginger. These all do very well with apples and change the flavor of the finished product slightly.
Usually within a few hours on medium to high heat in a crockpot, the once firm apples will now have been turned into a soft, clumpy, and aromatic mash. Every so often I will grab my spoon and stir to make sure it’s not sticking to the sides. Later I then grab my immersion blender and mix away until the ingredients are smooth.

The apples in Maryland were more than sweet enough so I never found the need to add additional sugar. If you do want it sweeter you can add honey, molasses, maple syrup, or birch syrup. The positive to using one of the liquid sweeteners are then you will get some of the vitamins that are naturally found in these like Iron, Calcium, Potassium, and Zinc. Here in Alaska, our apples are typically pretty tart so they need sweetening some. I add birch syrup straight from our own trees that I have harvested in the break-up or Spring months.
Prepare your jars
When you are at the last stages of cooking your applesauce in the crockpot and have now turned off your crockpot; start preparing your jars. Always get your jars and wash them in hot soapy water. Once clean place them in a now filled pot of warm water. Heat the water in the pot with the jars to boiling to further sterilize your jars. Let those boil for at least 10-15 minutes. I do not do this to the lids as I have read previously it can compromise your seals and break them down faster.
Strain your applesauce
If you have a food strainer or food mill you can run your warm applesauce through this to get a smooth sauce rather than a lumpy, chunky one. I have yet to get one of these so here soon I most likely will. We typically cut our harvested apples into small pieces; cut out the seeds and leave them in the crockpot with the peels. This does mean, however, that our finished product is more chunky.
Taste test time
It is at this point we do our final tasting. If we find we want more cinnamon, nutmeg, allspice, or any extra sugar we add that now. Unlike fruit leather, you do not have to worry overly much about the flavors intensifying in canning. You do not need to add anything further at this stage if your applesauce makes your taste buds happy.
Mise en place
Lay out a dry towel on your counter and make sure to have your canning implements in place. This includes your canning ladle, funnel, canning jar lifter, and a damp paper towel to wipe off the tops of your jars in case of spills. Use your jar lifter to remove all the now sterilized jars from the hot water and place it on the towel.
Using your ladle, add your now finished applesauce into the jars, making sure to use your funnel. This allows you to pour with less spillage on the sides of the jars. Fill each jar but make sure to leave at least a 1/2 inch headspace. Wipe off your jar tops with the damp paper towel; place your lid on the jar and screw tops on until it is fingertip tight. Never overly tighten your screw tops. Here is an article explaining exactly what “fingertip tight” actually means, in case you are curious. Using your canning jar lifter, lift all your now filled jars with tops screwed on into the hot water bath.
Hot water bath
Once the water begins to boil vigorously, set a timer for 20 minutes. Once the 20 minutes have passed. Turn off the heat and allow your hot water bath pot cool some. I usually give it 5-10 minutes. Use your jar lifter to lift your jars out of the hot water. Place onto the towel that should still be on your counter. Let the jars sit undisturbed for at least 30 minutes to an hour. You should hear that wonderful little “ping” each time a jar has successfully sealed. Within 24 hours lightly touch your tops of the jars. If you find one with a lid that flexes up and down then this means your jar has not successfully sealed. This jar must be refrigerated immediately and must be used within the next couple of days.
Preserve your apple harvest: Fruit Leather
Fruit leather is so incredibly simple, especially if you have a dehydrator on hand. If you do not, I have seen where you can do this also in your oven at the lowest setting. Some people use parchment paper, cooking oil spray, or non-stick silicone sheets called Silpat in their oven to hold the puree while the liquid is dehydrated out of the fruit mix. I have an Excalibur dehydrator that I got a long time ago that I use which makes things super simple.
We typically use apples as our base as they are usually the most plentiful and apples already have a large amount of pectin which gives the finished fruit leather a nice texture that is most similar to store-bought fruit leather. Normally when we have the apples cooking in the crockpot and they have hit the stage of “almost ready” we decide if we will be making apple sauce and canning it or fruit leather. If we decide fruit leather then we either add other fruit to cook down with it or we add additional spices and potentially sugar to sweeten it some. The flavors in fruit leather will become much stronger than what you will experience out of applesauce.
Fruit Leather Flavors
Some of our favorite flavor combinations are apple cinnamon, apple strawberry, apple blueberry, apple sweet potato (yes it really works out well!), chai apple (I use several chai tea bags in the cooking down apples for this one), and finally apple caramel. This one is the most decadent but it does work well with our small, tart apples that we have in the Interior of Alaska. If my son asks me for apple caramel then I make sure to grab a bag of caramels at the store and throw them into the cooked down apple puree just as we’re about to shut off the crockpot. Every so often I mix them with a spoon and when I see that the caramels are fully melted I will ladle the mix onto the silicone sheet for our dehydrator. I have more ideas for flavor combinations in this article.
If I have extra apple mixture I smooth this onto plastic wrap onto one of the trays. The fruit leather typically takes 12-14 hours. You can tell when the process of dehydration is complete when it is no longer really sticky. There should be some mild stickiness but when touching it your fingers should not come away with apple mixture. Always make sure to fully dehydrate this because you do not want mold to grow on it. Once your fruit leather is fully complete, cut it into the desired size and roll it up. You can store it away in a labeled zip lock bag.
Preserve your apple harvest: Apple Butter
Apple butter is so incredibly simple to make. Ultimately you complete all your initial steps of making apple sauce but then go a bit further and allow your apple sauce to cook…..and cook…and cook some more. The point here is to allow it to get very thick. You need a consistency that is thick enough to resemble jam. The best way to measure this is to take a spoonful of the apple butter and then point the spoon vertically. If the apple butter slides off quickly you will need to cook it further.
Time to add an extra bit of zest
When your apple butter has reached the desired consistency add any additional spices to taste. You can make apple butter without adding sugar however we typically prefer to add molasses or maple or birch syrup to ours. If you forgo the sweetener you will have both a bit more tart finished product and it will only be shelf-stable for about 12 months. At this point, you can also decide what other spices you would like to add. If I start with the knowledge that I’m going to be making apple butter I typically do not flavor the apples until this point because the flavors will intensify greatly. You do not a finished product that tastes overwhelmingly like nutmeg or cinnamon.
Mise en place
Lay out a dry towel on your counter and make sure to have your canning implements in place. This includes your canning ladle, funnel, canning jar lifter, and a damp paper towel to wipe off the tops of your jars in case of spills. Use your jar lifter to remove all the now sterilized jars from the hot water and place it on the towel.
Using your ladle, add your now finished apple butter into the jars, making sure to use your funnel. This allows you to pour with less spillage on the sides of the jars. Fill each jar but make sure to leave at least a 1/4 inch headspace. Wipe off your jar tops with the damp paper towel; place your lid on the jar and screw tops on until it is fingertip tight. Never overly tighten your screw tops. Here is an article explaining exactly what “fingertip tight” actually means, in case you are curious. Using your canning jar lifter, lift all your now filled jars with tops screwed on into the hot water bath.
Hot water bath
Once the water begins to boil vigorously, set a timer for 20 minutes. Once the 10 minutes have passed. Turn off the heat and allow your hot water bath pot cool some. I usually give it 5-10 minutes. Use your jar lifter to lift your jars out of the hot water. Place onto the towel that should still be on your counter. Let the jars sit undisturbed for at least 30 minutes to an hour. You should hear that wonderful little “ping” each time a jar has successfully sealed. Within 24 hours lightly touch your tops of the jars. If you find one with a lid that flexes up and down then this means your jar has not successfully sealed. This jar must be refrigerated immediately and must be used within the next couple of days.
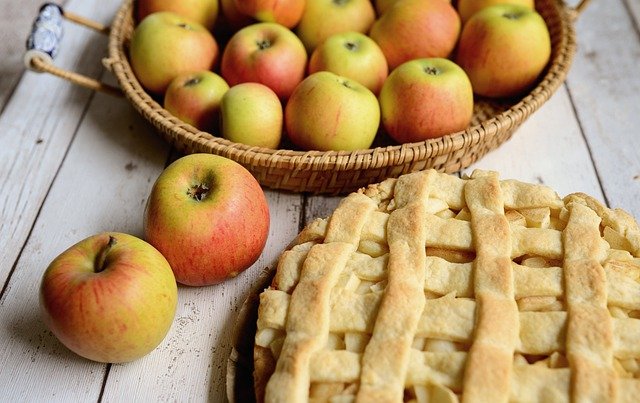
Preserve your apple harvest: Apple Pie Filling
Homemade apple pie is a bit different than apple sauce or apple butter. In this type of canning recipe, you do not want to cook those apples at all. They will cook plenty once in the canning jars. For this process, it helps to have a teammate in the kitchen as one person can work on the apple pie filling while the other can start peeling and cutting up apples. Essentially you want all your apples chopped into small bite-sized pieces and it is best to peel them because you do not want peels in your apple pie filling.
Some recipes call for blanching them but I do not do that nowadays because our apples are so small that they would be cooked and mushy in a very short time. I like to have some bite in my apple pie or apple crumble. You will want to have a large bowl filled with water and about a tbsp of lemon juice. This will prevent the browning of the apples.
You will need your other teammate to be actively working on cooking the apple pie filling which is more or less syrup. Here is the breakdown of your ingredients per the amount of apples.
| Blanched, sliced fresh apples | 3-1/2 cups | 6 quarts |
| Granulated sugar | 3/4 cup + 2 tbsp | 5-1/2 cups |
| Clear Jel® | 1/4 cup | 1-1/2 cup |
| Cinnamon | 1/2 tsp | 1 tbsp |
| Cold Water | 1/2 cup | 2-1/2 cups |
| Apple juice | 3/4 cup | 5 cups |
| Bottled lemon juice | 2 tbsp | 3/4 cup |
| Nutmeg (optional) | 1/8 tsp | 1 tsp |
Make sure to only use Clear Jel meant for cooking. You do not want the Clear Jel that does not require cooking. Here is a link to the Clear Jel I prefer. The process for the individual cooking the filling will go very fast so this person should probably start this when you are just about complete with peeling and cutting up your apples.
Mise en place
Lay out a dry towel on your counter and make sure to have your canning implements in place. This includes your canning ladle, funnel, canning jar lifter, and a damp paper towel to wipe off the tops of your jars in case of spills. Use your jar lifter to remove all the now sterilized jars from the hot water and place it on the towel.
Using your ladle, add your now finished cut up apples into the jars, making sure to use your funnel. Add your liquid apple pie filling. This will still be liquid enough that it will fill in all the holes between the apple pieces. Fill each jar but make sure to leave at least a 1/2 inch headspace. Wipe off your jar tops with the damp paper towel; place your lid on the jar and screw tops on until it is fingertip tight. Never overly tighten your screw tops. Here is an article explaining exactly what “fingertip tight” actually means, in case you are curious. Using your canning jar lifter, lift all your now filled jars with tops screwed on into the hot water bath.
Hot water bath
Once the water begins to boil vigorously, set a timer for 25 minutes for pints or quarts. Once the 10 minutes have passed. Turn off the heat and allow your hot water bath pot cool some. I usually give it 5-10 minutes. Use your jar lifter to lift your jars out of the hot water. Place onto the towel that should still be on your counter. Let the jars sit undisturbed for at least 30 minutes to an hour. You should hear that wonderful little “ping” each time a jar has successfully sealed. Within 24 hours lightly touch your tops of the jars. If you find one with a lid that flexes up and down then this means your jar has not successfully sealed. This jar must be refrigerated immediately and must be used within the next couple of days.
I usually suggest waiting at least a month before using this but you could open it sooner if you truly felt the need. The flavors will only get better if it is allowed to sit and rest for a couple of months. Perfect timing for the holidays!
Preserve your apple harvest: Spiced Apple Chutney
I absolutely love any kind of curry so this one is fun to make. Unfortunately as of late though it seems like I never have enough apples to make this. Hopefully soon when our trees are fully producing I will finally have enough apples. This is great on pork chops, chicken, or if you like you can turn it vegan and serve it with chickpeas. It does well with that too!
- You will need 4 medium sized apples. I typically peel and core the apples after I have mixed all the other ingredients in my saucepan.
- 2 cups apple cider vinegar
- 2 cups brown sugar
- 1 cups onions, diced
- 1 cup sultanas or cranberries. I really like cranberries in this as they are tart and work well with the other spices.
- 3-4 garlic cloves, minced
- 1 tablespoon ginger
- 1 tablespoon mustard seeds
- 2 tsp curry powder
- 1 tsp ground allspice
- 1 tsp salt.
Mix all your ingredients minus the apples in a sauce pan, stir to make sure everything is fully incorporated. Add your apples. Bring to a boil, stir it constantly. You want to make sure it doesn’t burn. After about 5 minutes of boiling, reduce your heat and simmer for 30 minutes. Meanwhile, prepare your jars and large pot for processing in the hot water bath.
Mise en place
Lay out a dry towel on your counter and make sure to have your canning implements in place. This includes your canning ladle, funnel, canning jar lifter, and a damp paper towel to wipe off the tops of your jars in case of spills. Use your jar lifter to remove all the now sterilized jars from the hot water and place it on the towel.
Using your ladle, add your now cooked curried apple chutney into the jars, making sure to use your funnel. Fill each jar but make sure to leave at least a 1/2 inch headspace. Wipe off your jar tops with the damp paper towel; place your lid on the jar and screw tops on until it is fingertip tight. Never overly tighten your screw tops. Here is an article explaining exactly what “fingertip tight” actually means, in case you are curious. Using your canning jar lifter, lift all your now filled jars with tops screwed on into the hot water bath.
Hot water bath
Once the water begins to boil vigorously, set a timer for 20 minutes for pints or quarts. Once the 20 minutes have passed. Turn off the heat and allow your hot water bath pot to cool some. I usually give it 5-10 minutes. Use your jar lifter to lift your jars out of the hot water. Place onto the towel that should still be on your counter. Let the jars sit undisturbed for at least 30 minutes to an hour. You should hear that wonderful little “ping” each time a jar has successfully sealed. Within 24 hours lightly touch your tops of the jars. If you find one with a lid that flexes up and down then this means your jar has not successfully sealed. This jar must be refrigerated immediately and must be used within the next couple of days.
I hope that these suggestions and recipes give you some great ideas which make preserving your apple harvest this season enjoyable and rewarding! Every year that I have put away jars of freshly made chutneys, jams, jellies, apple sauce, etc etc I feel as if I have stored gold in my cupboard rather than some freshly picked and canned produce. I assure you, over time as your skills increase in canning it does become incredibly rewarding! Especially when you get to serve such wonderful treats during the holidays!

Great article! Never knew that apples were not native to America
Here in northern BC, we also harvest apples for critter food mostly. We rarely get fruit that is suitable for cooking, canning or table use..
We slice, dry, can apples for rabbit and chicken winter feed cheaper than bag feed per kilo.. Besides keeping bears out of people yards, trees, town and other trouble..
What a fantastic post! This is so chock full of useful information I can’t wait to dig deep
and get started utilizing the resources you have given me.
Best regards,
Abildgaard Cannon
Thanks Abildgaard! You wouldn’t believe how long this one took! I tried my best to give a bit more historical details before getting to what I consider the fun part, putting the food preservation into motion. I love learning the little factoids but getting into the kitchen and playing with recipes is what I love most! I’ll be having one come out soon on lacto-fermentation. 🙂
Tamara
My brother recommended I would possibly like this blog.
He used to be totally right. This publish truly made my day.
You can not imagine just how so much time I had spent for this info!
Thanks!
I know this if off topic but I’m looking into starting my own weblog and was curious
what all is needed to get setup? I’m assuming having a blog like yours would
cost a pretty penny? I’m not very internet savvy so I’m not 100% positive.
Any tips or advice would be greatly appreciated.
Appreciate it
Hi Josette,
It’s not too bad to start up and I had some of the folks over at Bluesky walk me through some of the trickier parts of web design. (mostly coding, tech issues when I would hit a snag) It all depends on how simple or complex you would like to make your site. There are some pretty nice themes out there that are free or pretty affordable. Just keep in mind though, the free ones tend to not be kept up as much and sometimes you might find that there is no support when the theme suddenly has a huge hiccup.
Tamara